
This article is part of a series on Figma Fundamentals.
In the world of product design, proficiency begins with mastering the essentials. Figma offers a gateway to a seamless design suite specifically tailored for product design. Before we dive into the intricacies of the Figma interface, let’s kickstart your journey by creating a Figma account and downloading the application.
Creating Your Figma Account and Downloading the App
Head to the Figma website, where a straightforward sign-up process awaits. Basic access to Figma is currently free however, I do suggest purchasing a subscription to allow for room to grow. Once your account is set up, the next step is to download the Figma application for your computer. Whether you’re on Windows or Mac, Figma’s compatibility ensures a smooth installation process. With your account created and the application at your fingertips, you’re now ready to immerse yourself in the world of Figma design.
Figma’s Workspace Elements
- Canvas: The canvas is the primary working area where designs are created. It acts as a blank space where users place and arrange design elements.
- Toolbar: The toolbar houses a variety of tools for creating and manipulating design elements. It includes tools for selections, shapes, text, and more. These tools facilitate the design process by providing easy access to essential functionalities.
- Layers Panel: The layers panel displays a hierarchical view of all design elements within a file. Users can organize and manage layers by rearranging them, grouping elements, and adjusting their visibility or properties.
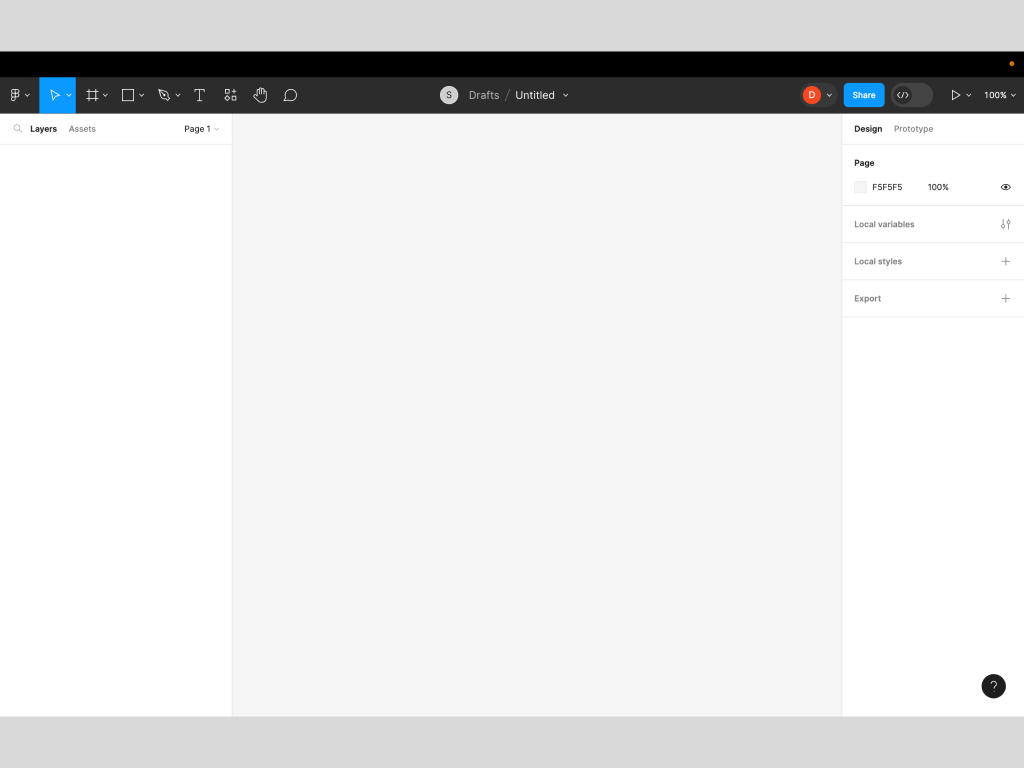
Caption: In this screenshot, we can see the Figma Canvas (middle), Toolbar (top), and Layers Panel (left).
Understanding the Design Panel
- Adjusting Styles: The Design Panel allows users to modify various styles of selected elements, such as adjusting fill and stroke colors, border styles, shadows, and more. It provides precise control over the visual appearance of design elements.
- Alignment and Distribution: Within the properties panel, alignment options enable precise arrangement and distribution of elements. Users can align objects vertically, horizontally, distribute spacing evenly, and adjust their positions relative to one another.
- Applying Effects: Figma’s properties panel also offers effects like blurs, shadows, and other visual enhancements that can be applied to elements to create depth and visual interest in designs.
Caption: In the same screenshot, we can see the Figma Design Panel (right), which allows access to design controls and options for creating and editing elements within the canvas.
Navigating and Using Essential Tools
- Selection Tool: The selection tool allows users to click and manipulate design elements. It is essential for moving, resizing, and editing objects within the canvas.
- Shapes Tool: Figma provides various shape tools, including rectangles, circles, polygons, and more. These tools help in creating basic shapes that form the foundation of design elements.
- Text Tool: The text tool enables the addition of text layers to designs. Users can input text, format it, and adjust typography settings to customize the textual content.
Key Takeaways
- Starting with Figma: Creating a Figma account and downloading the application marks the beginning of your journey into Figma design. It’s accessible, with a straightforward sign-up process and compatibility across Windows and Mac systems.
- Understanding Figma’s Workspace Elements: The canvas acts as the primary workspace for creating designs, while the toolbar provides essential design tools and functionalities. The layers panel offers a hierarchical view and management system for design elements within a file.
- Utilizing the Design Panel: Figma’s Design Panel allows for precise modifications to element styles, including fill colors, strokes, shadows, and more. It also facilitates alignment, distribution, and the application of visual effects to enhance designs.
- Essential Tools for Design: The selection tool aids in manipulating elements, while shape tools assist in creating basic shapes. The text tool enables text layer additions with formatting and typography adjustments for customizable textual content.
These takeaways highlight the foundational aspects covered in the lesson, emphasizing the starting point with Figma, understanding its workspace elements and design tools, and beginning to navigate the interface for creating designs.
Parting Words
As we conclude this week’s lesson on Figma Fundamentals, thank you for being part of the learning journey! Join me again next week for more as we continue to explore Figma.
Want to continue the conversation? Drop your thoughts in the comments below. If you found today’s article helpful, please consider sharing it with your network.
Until next time, keep practicing, experimenting, and refining your skills. Remember, design is a journey of continuous improvement!